In honor of St. Patrick's Day - most GREEN fabrics are 15% off or more with coupon code CLOVER
We've got this great four leaf clover project to share with you! We sell kits here, or just follow our instructions and use our free pattern!
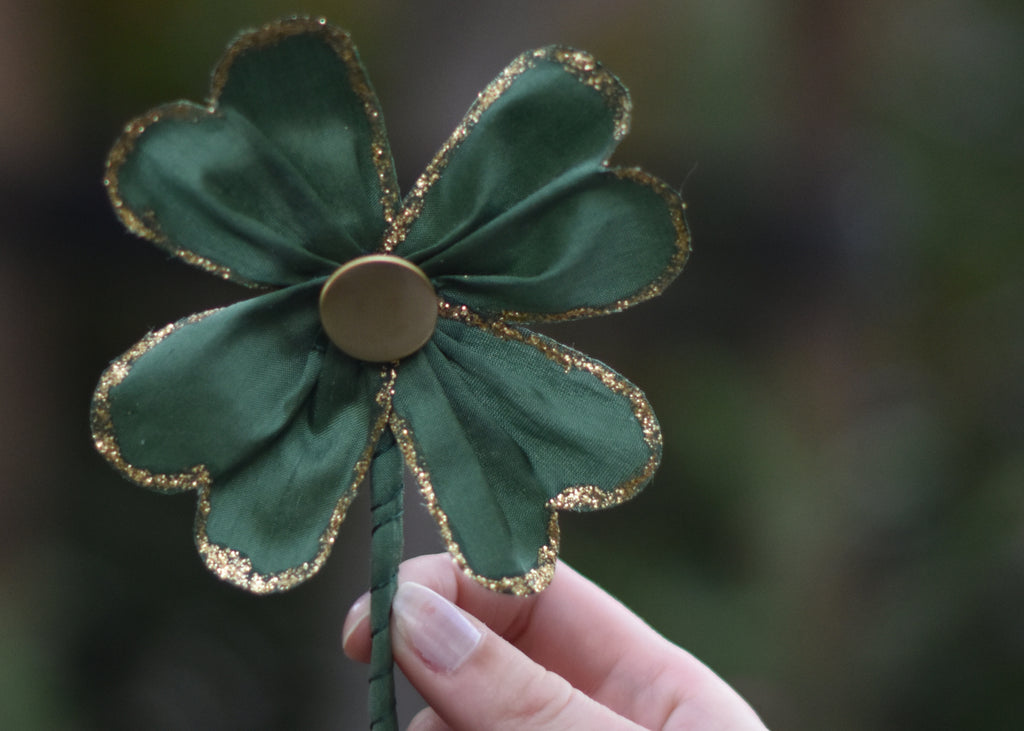
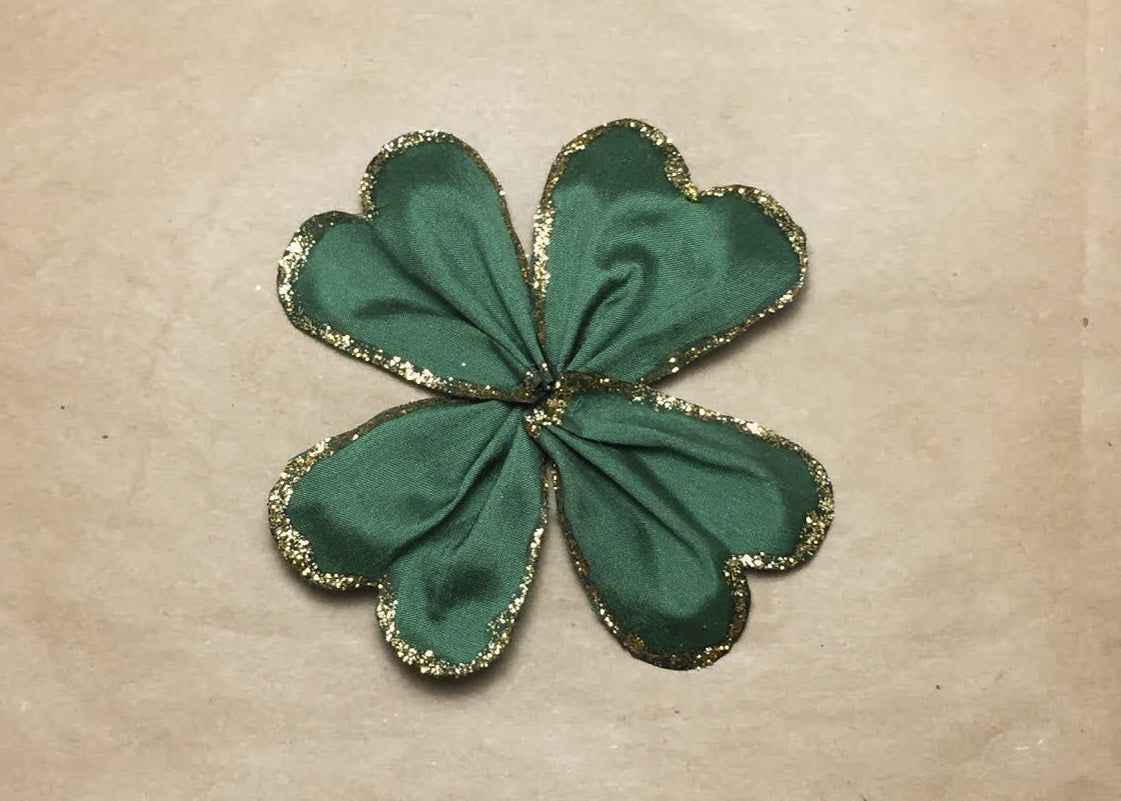
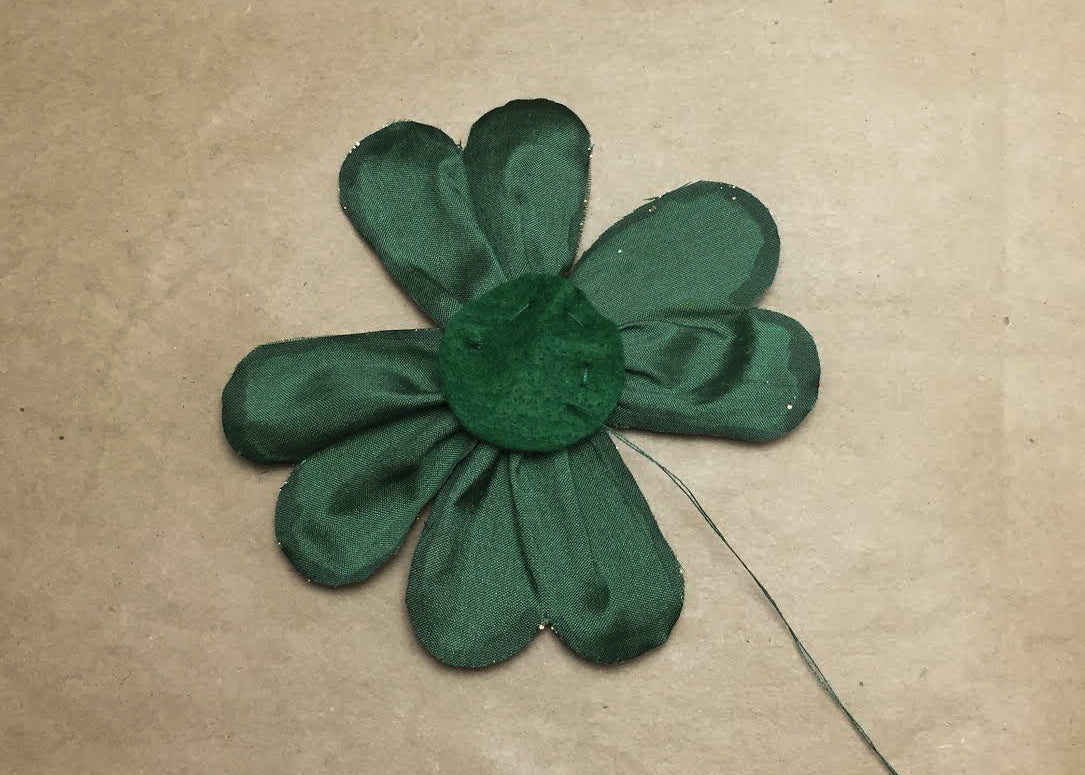
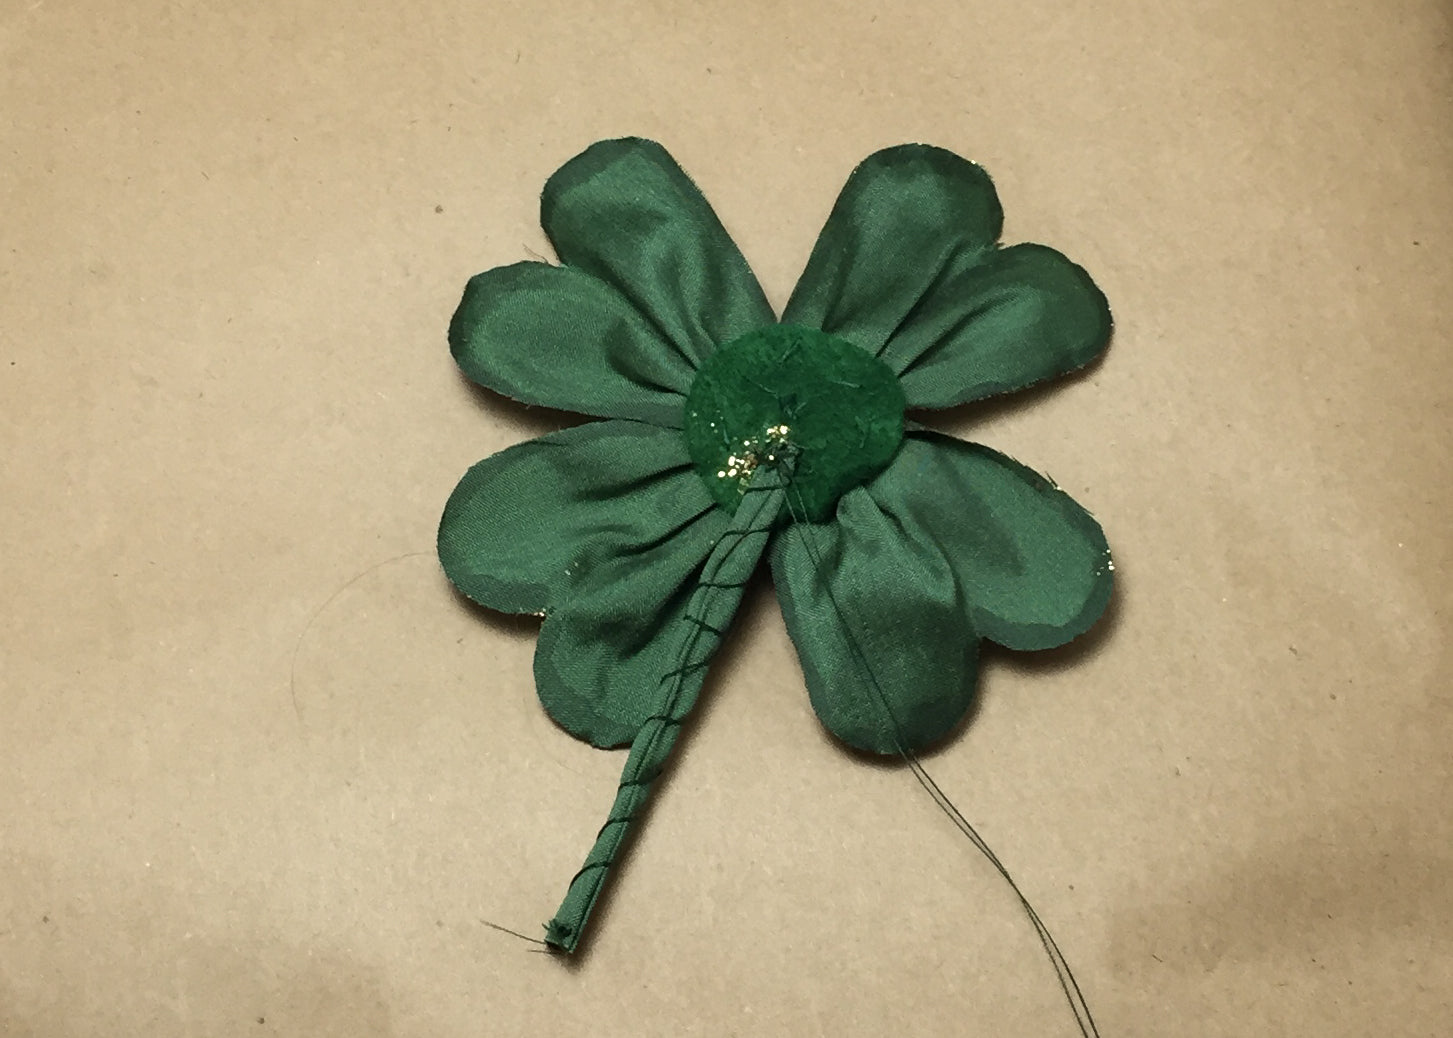
Here is the finished clover:
What you will need:
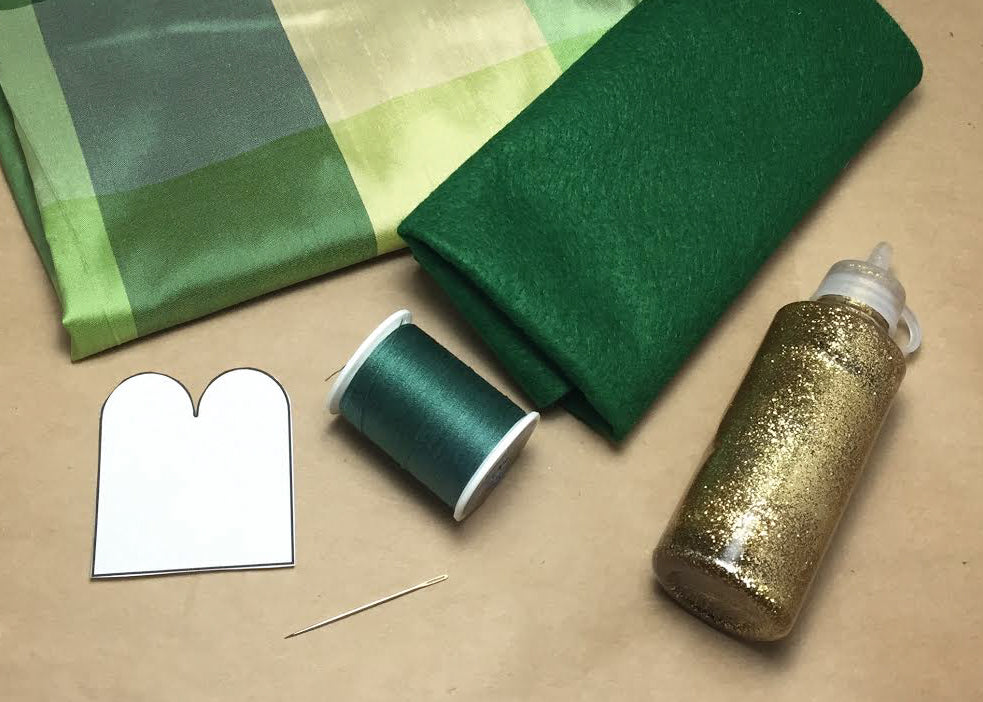
- Scissors
- Less than 1/8 yard of green fabric. We used this. A fat 1/4 will give you 6 small squares of a bunch of green tones. On sale for $3.95 per fat 1/4!
- Glitter glue or some kind of glue or paint (for extra sparkle, but also to prevent fraying)
- Thread
- Button
- Small piece of felt
- Needle
- Clover template pattern (We made this one with 3 sizes included that you can print for free. The medium sized template is what we used for these clovers.)
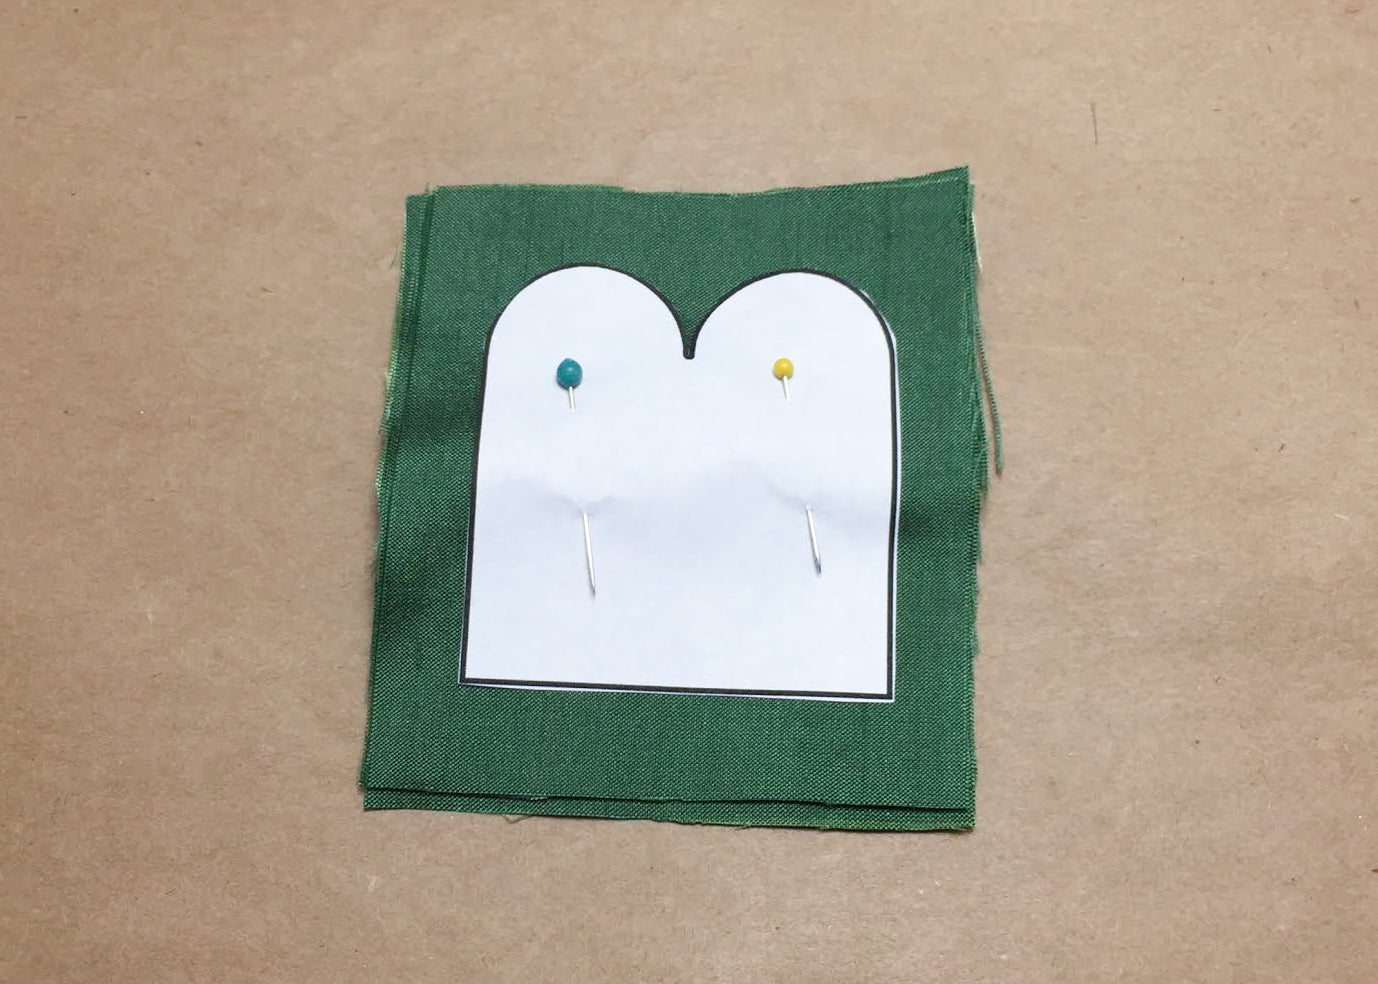
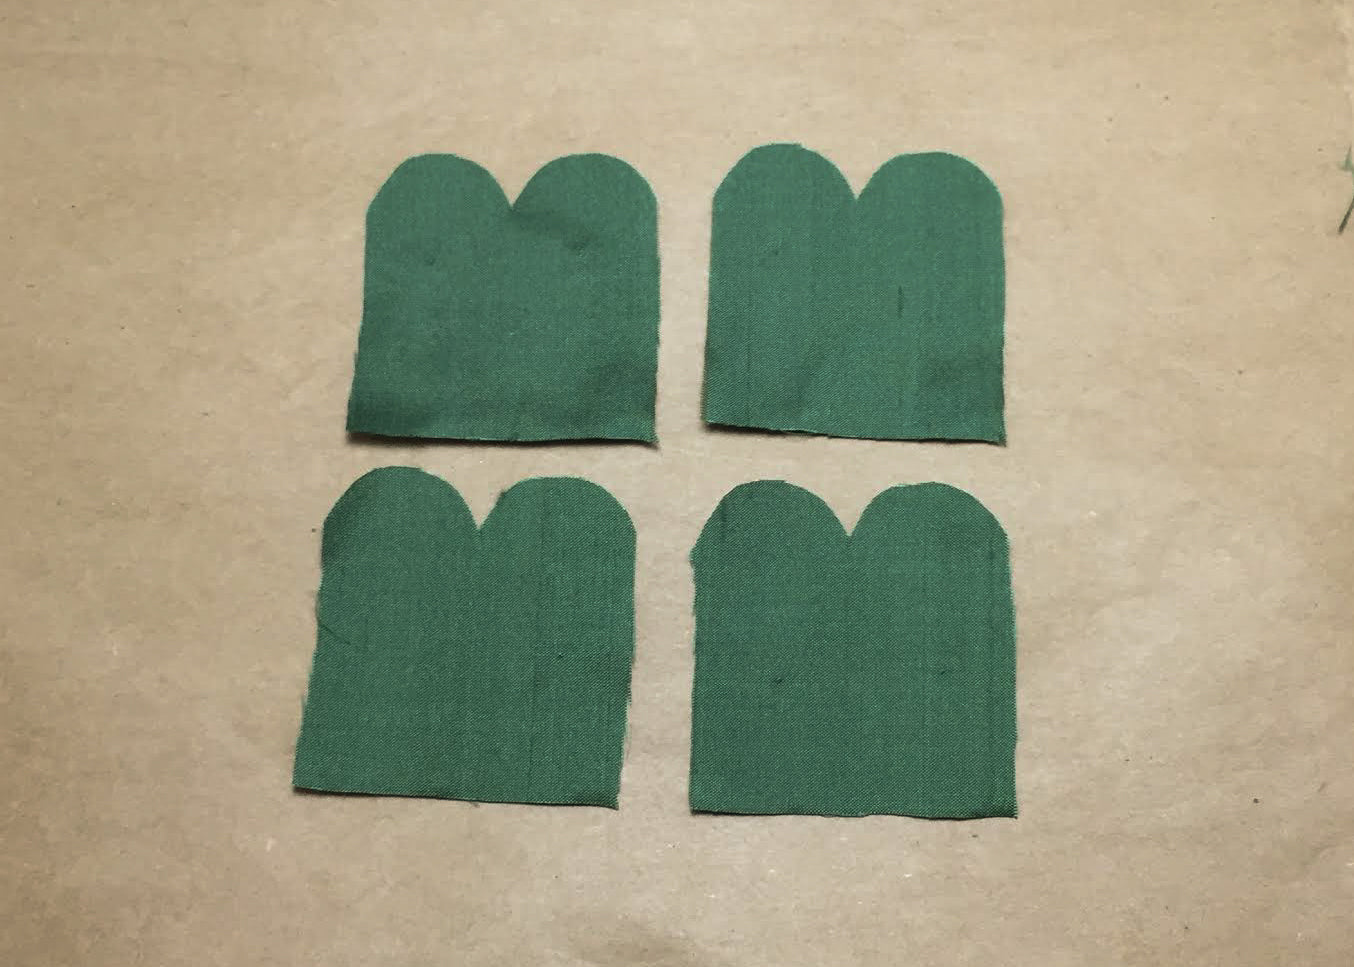
Step 1:
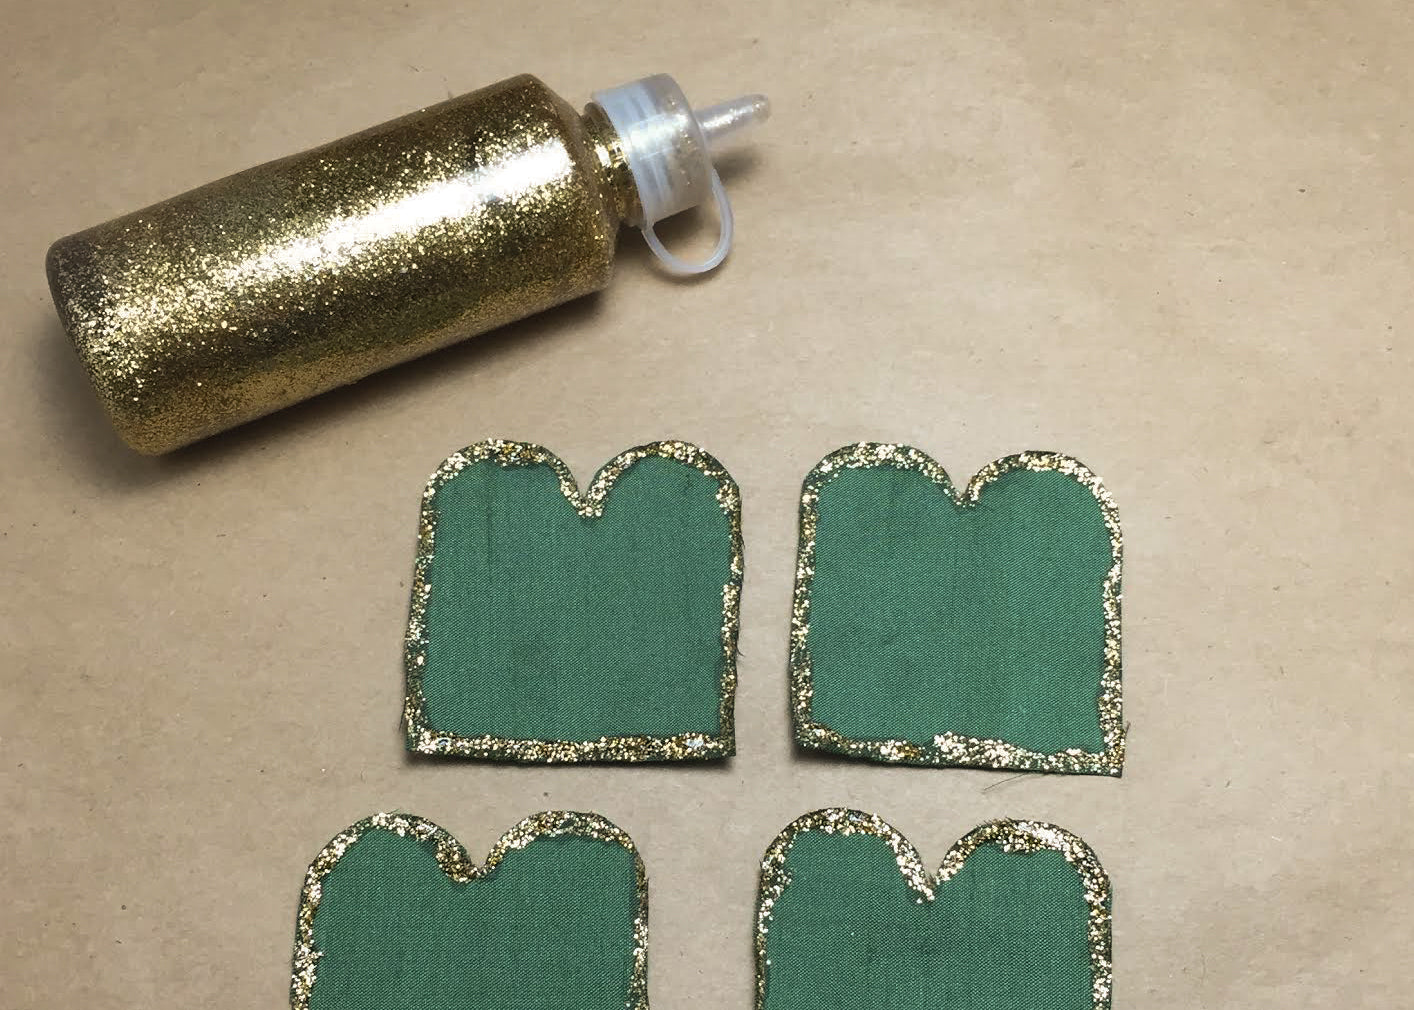
Cut out your small, medium, or large size clover template. (We used the medium one for our clovers) Pin the clover template to 4 layers of fabric (If using a thin fabric. If you are using a thicker fabric, or felt, it would be best to cut out one or two layers at a time.) Cut out your clover leaves.
Step 2:
Using glitter glue (we used gold) or some kind of glue or paint, glue around the edges. This is to prevent fraying but also adds some sparkle!
Step 3:
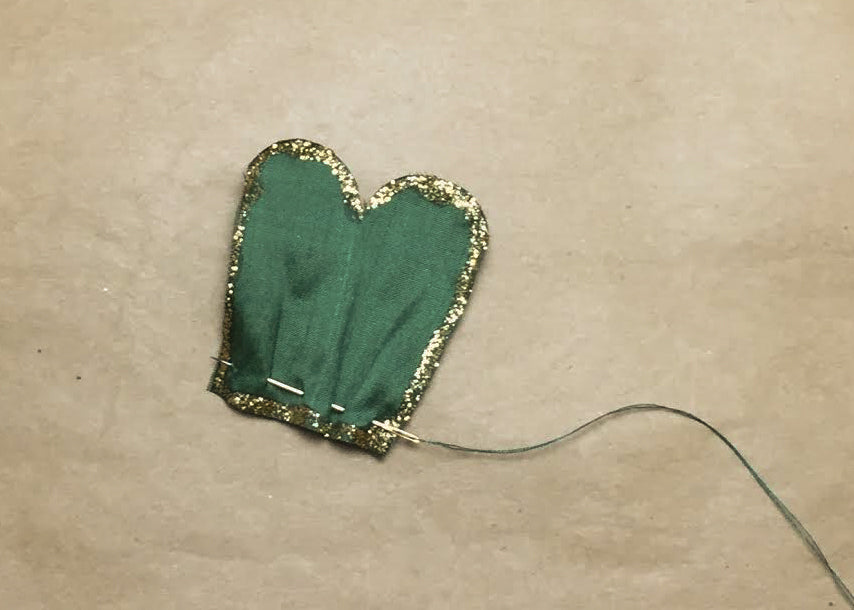
Thread your needle. Now baste or gather stitch along the bottom edge of one leaf.
Step 4:
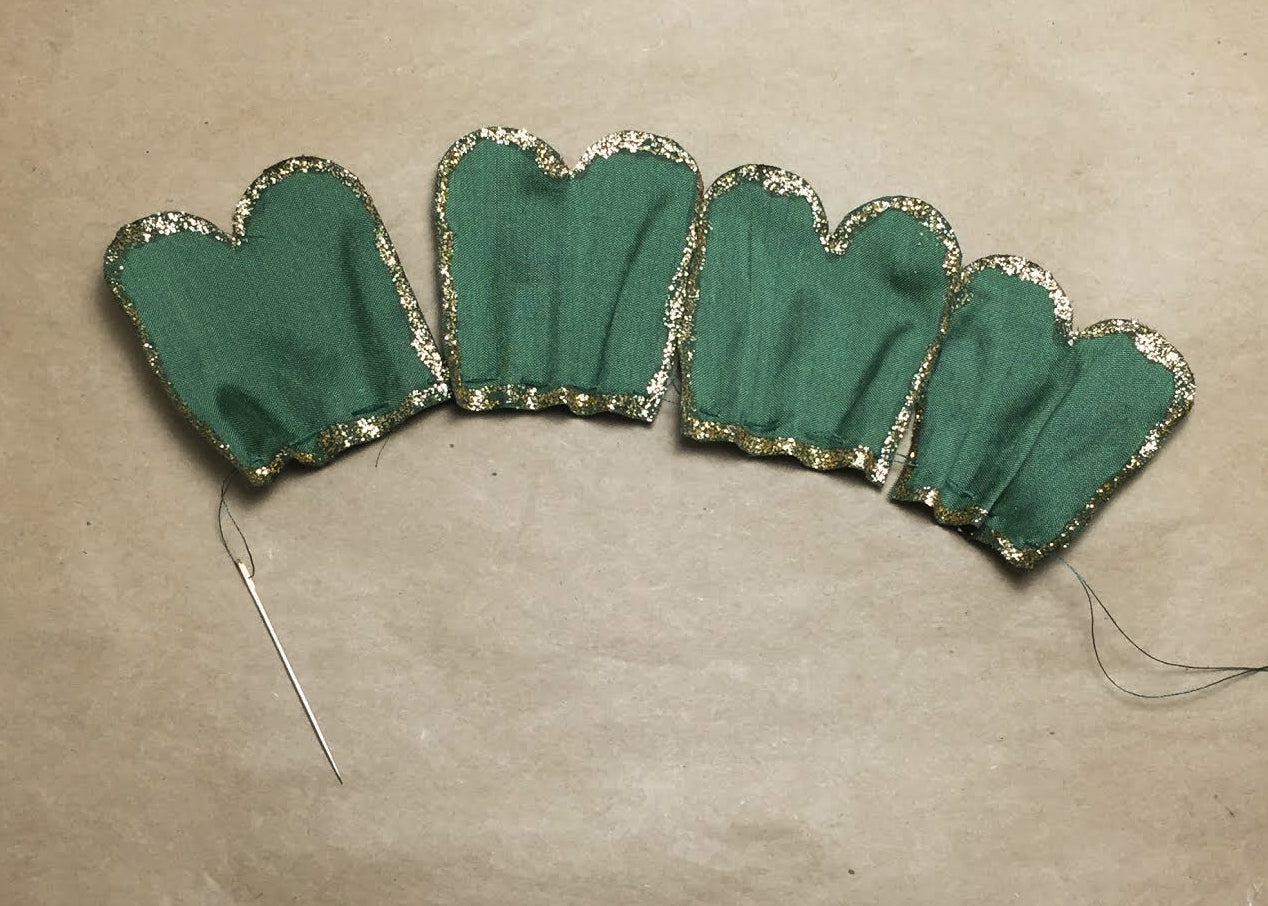
Repeat with all four leaves.
Step 5:
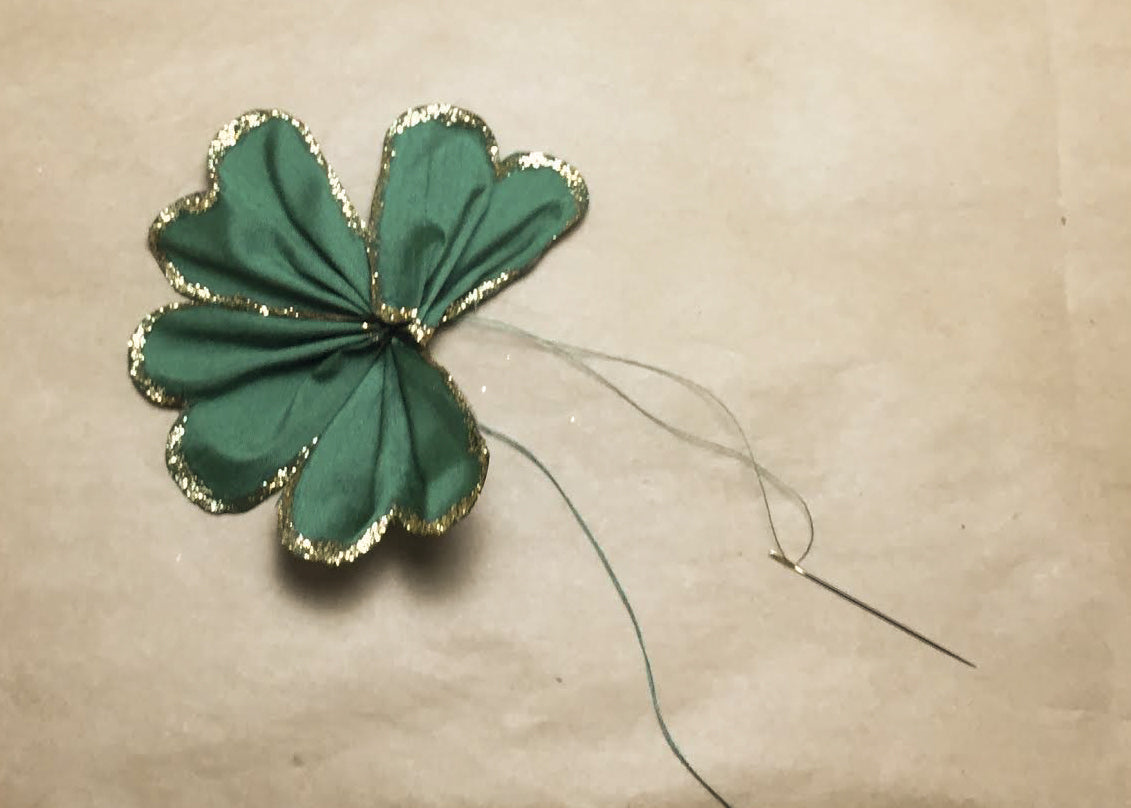
Tie a knot. Not too tight, not too loose.
Step 6:
Adjust your leaves so they make a clover shape.
Step 7:
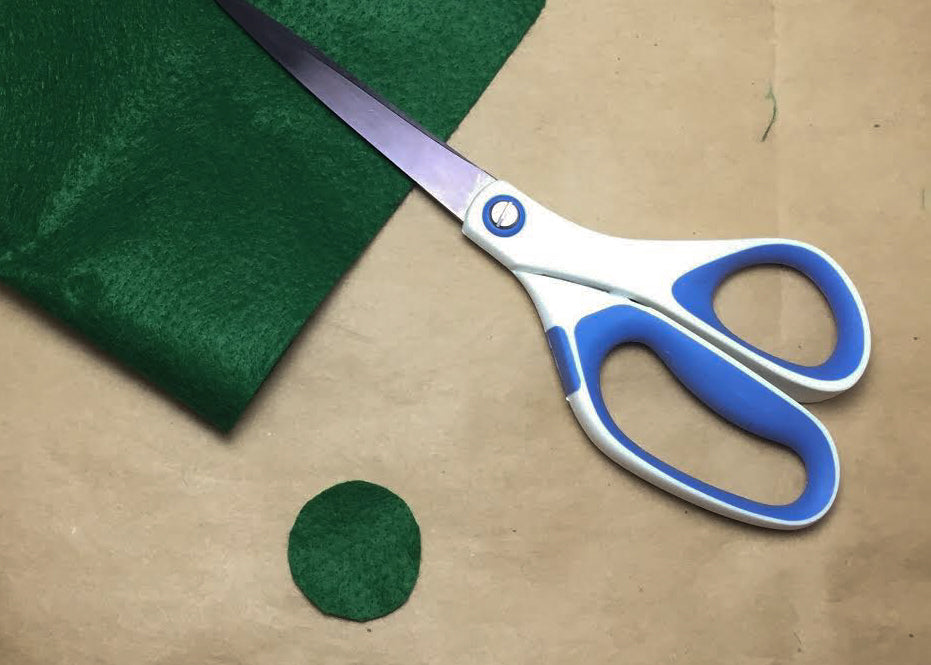
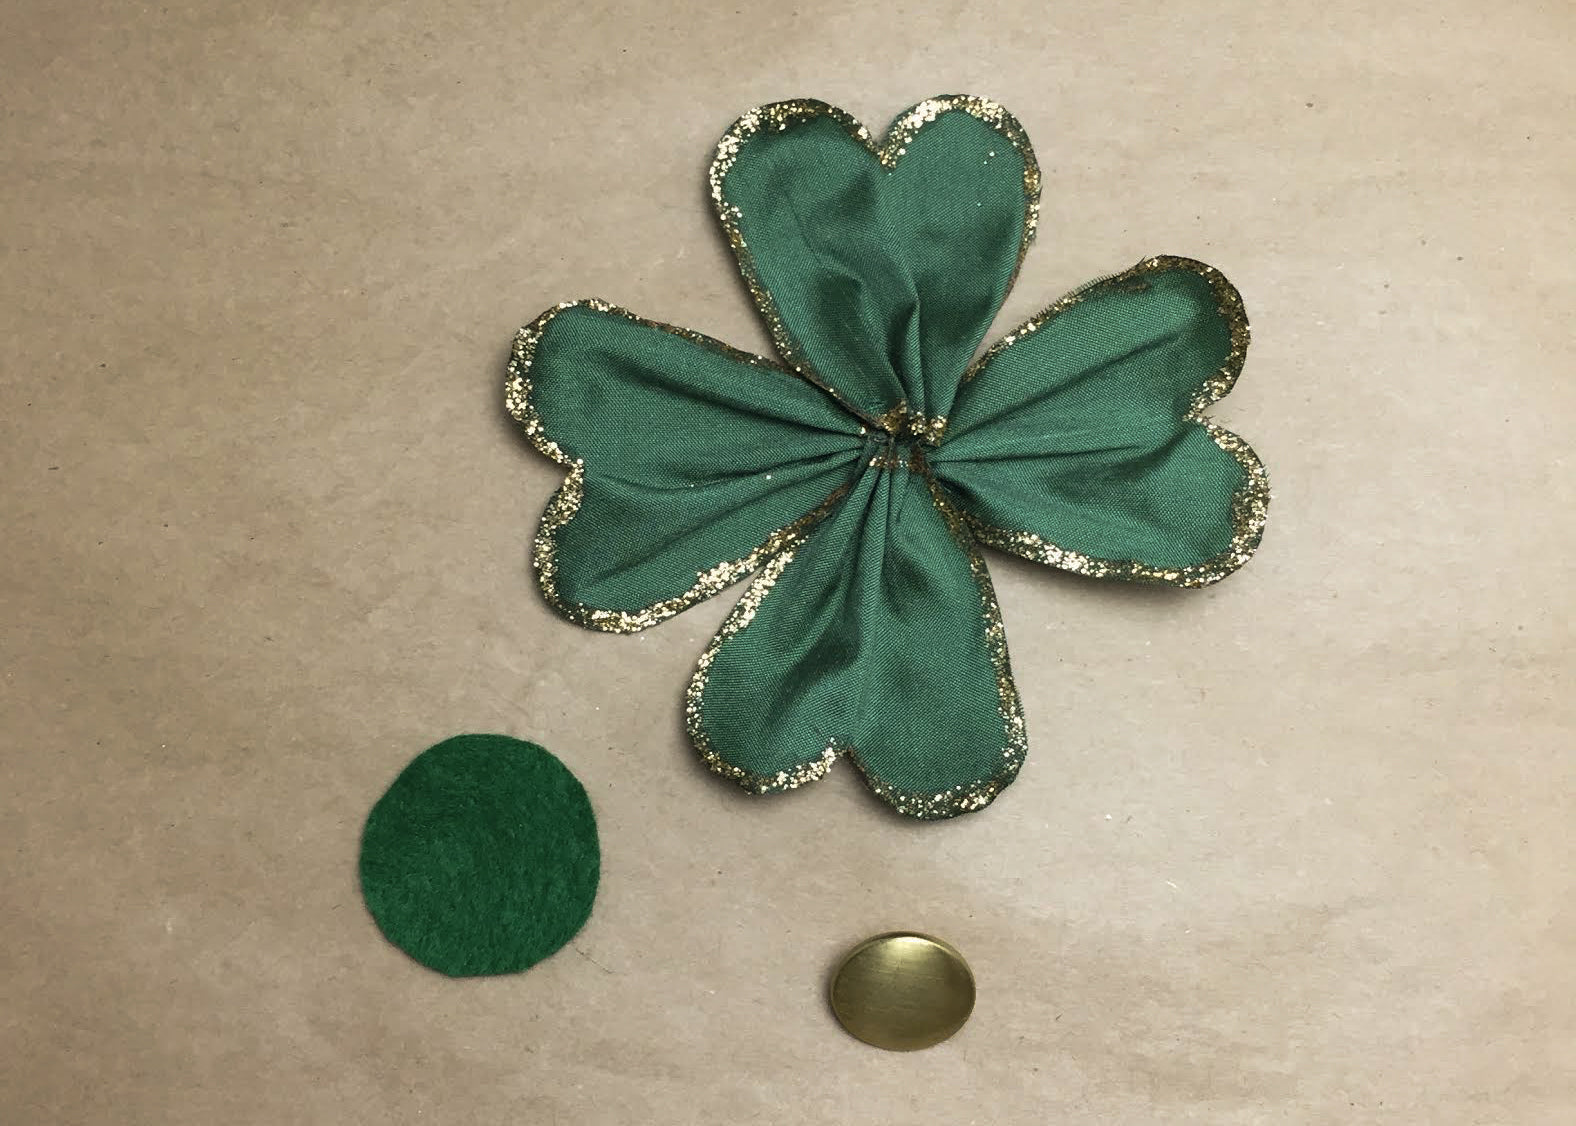
Cut out a small circle of felt for the back. This will create a backing for anything you want to add (a stem, a pin back, a barrette clip, etc).
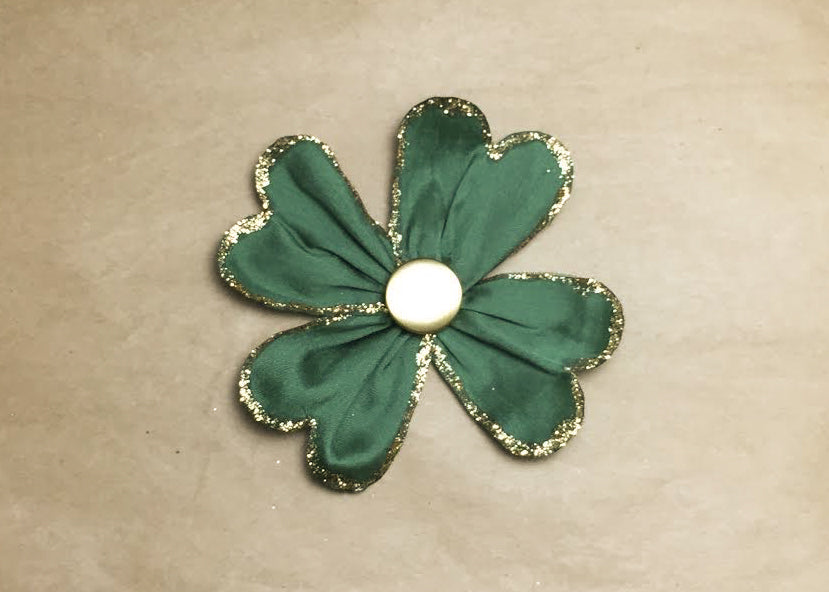
Step 8:
Start sewing your button onto the front middle of the clover. After a few stitches through the shank or holes, I started sewing on the circle of felt to the back at the same time. Adjust the leaves as you are sewing on the circle to help them stay in the place you want them to.
Step 9:
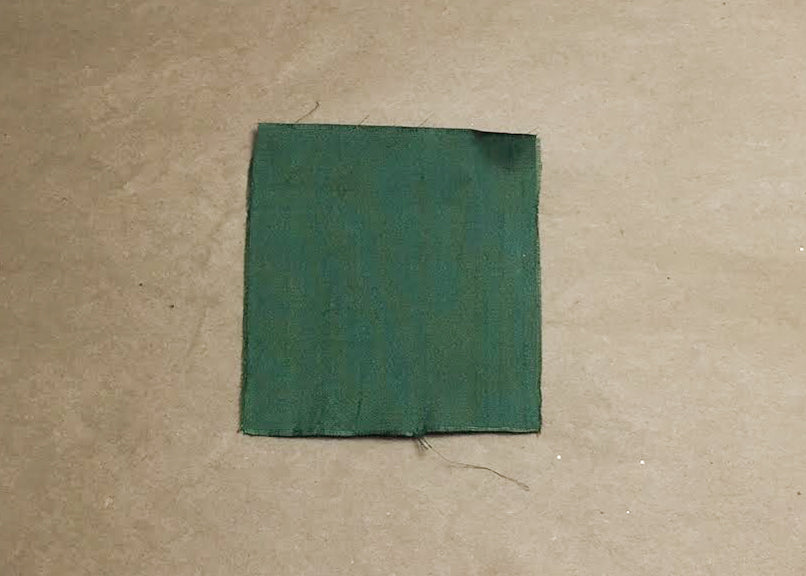
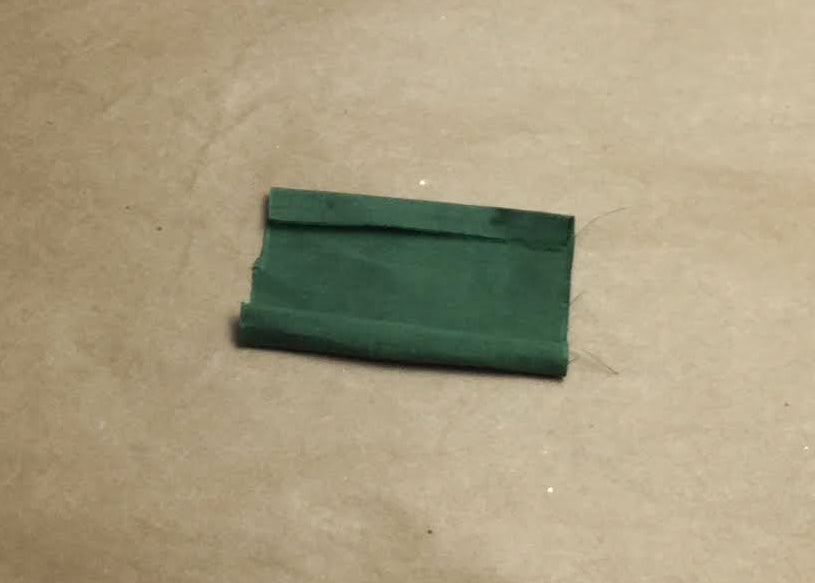
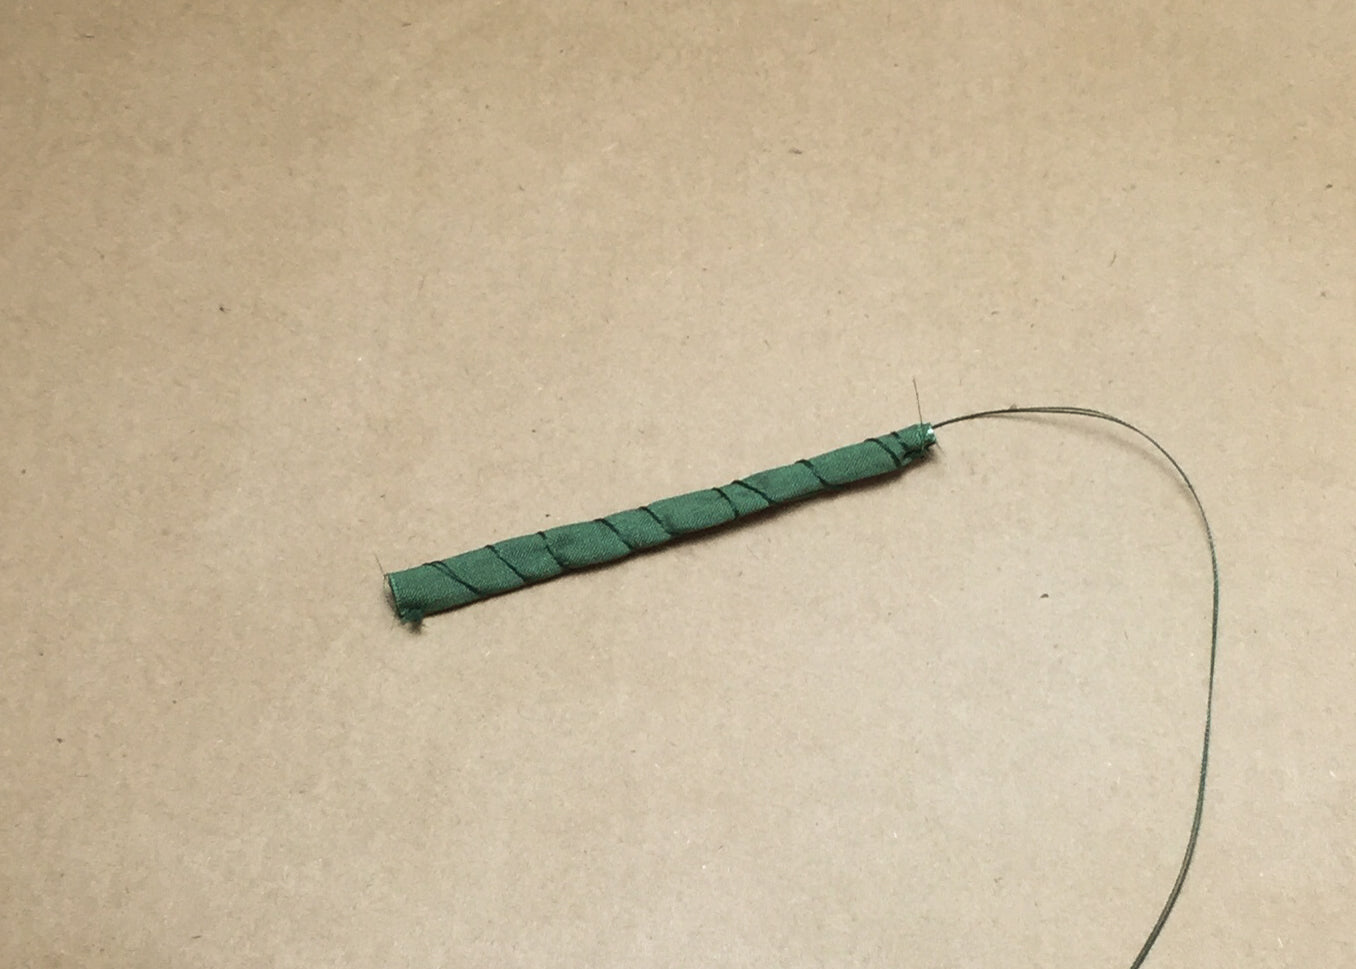
This is optional, but I think it makes it look more clovery. Make the stem. Take another square of the same fabric. About 2.5 by 2.5 inches or so. Start rolling it (as tightly or loosely as you would like). When you get close to the other end, fold the other end in a little so as not to leave a raw edge on the outside.
Step 10:
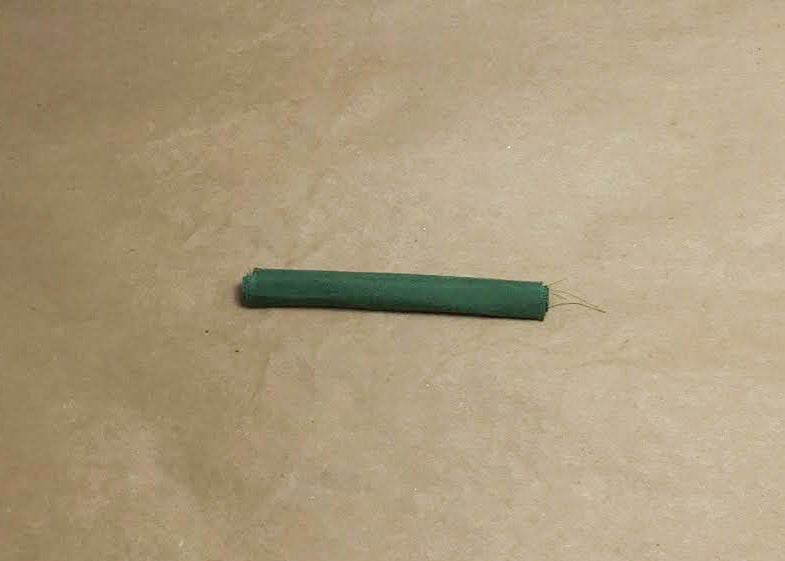
Thread your needle once more. Draw the thread through one end of your rolled stem (the end that you want at the bottom of the clover. Now, I wrapped the rolled stem with thread up to the other end. Again, you can do this as tightly or loosely as you want, or even taper the tightness. Once you get to the other end, draw the needle and thread through the fabric a couple times. Now, you can directly attach the stem to the felt circle on the back of your clover. Do this with a few stitches. Then, just use a little more glue or paint on the raw end.

And DONE!
